Schedule Call Data Reports
Read time: 47 s
Table of Contents
Within the Manage Organization view, the Call History section offers call data reports sent to your email.
How to Create Scheduled Call Data Reports
- Ensure you are in the Manage Organization view and click the Call History tab.
- Click Scheduled Exports.
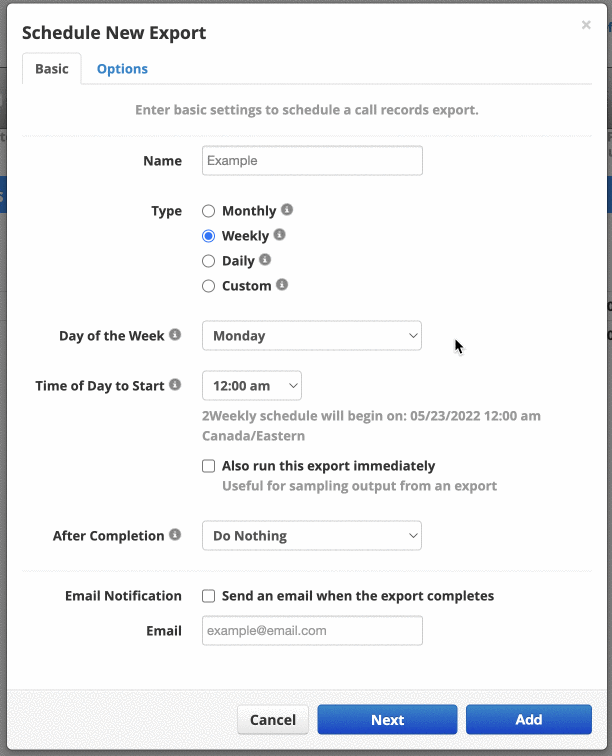
- Click New Export.
- Enter the basic settings for the report, you will have slightly different options depending on the type you pick:
- Name
- Type (monthly, weekly, daily or custom)
- Also run this export immediately
- After Completion (do nothing, email attachment)
- Email Notification
- Enter your email
- Click Next.
- Enter the configuration options for your exported report:
- User (leave blank for all users)
- Include/exclude inbound calls
- Include/exclude outbound calls
- Include headers
- Off-net calls only (only calls to non-n2p numbers)
- Format (always set to advance)

